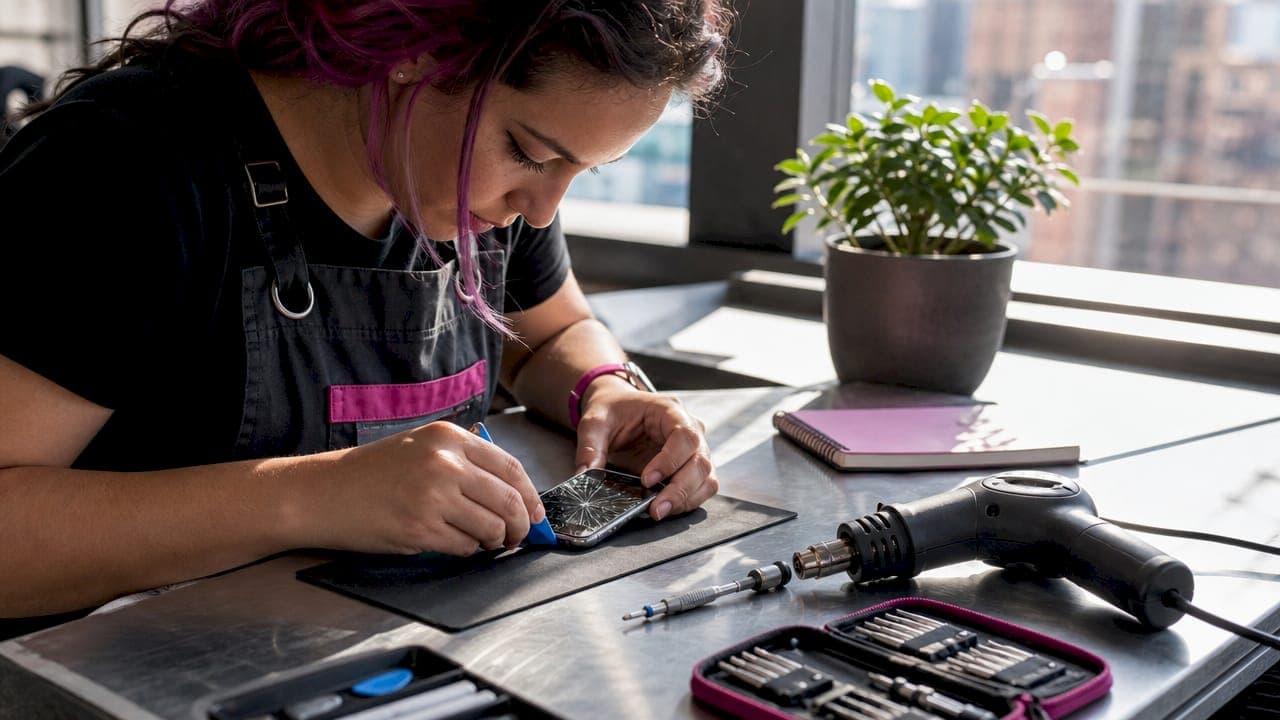
Phone screen replacement is a sequence of clear, hands-on steps that any careful person can complete at home using tools like suction cups, spudgers, precision screwdrivers, and isopropyl alcohol. The process covers everything from powering down your device safely to testing the new screen before final assembly. Done right, a DIY repair saves you real money and gets your phone back in your hands fast. This guide walks you through every phone screen replacement step, including the tools you need, how to avoid the most common mistakes, and when it makes sense to call in a professional.
What tools do you need for phone screen replacement?
The right tools make or break a screen replacement. Walk into this repair with the wrong equipment and you risk scratching your phone, shorting a circuit, or snapping a flex cable. Here is exactly what to gather before you start.
Core tools:
- Precision screwdriver set (Phillips #000, Pentalobe, and Torx T2 are the most common sizes for iPhone and Android models)
- Suction cup for lifting the screen away from the frame without cracking it further
- Plastic pry tools and picks for slicing through adhesive along the edges
- Spudger for disconnecting flex cables and prying up connectors safely
- Tweezers for handling small screws and connectors
Heat and cleaning supplies:
- Hair dryer or heat gun set to low heat for softening adhesive along screen edges
- Isopropyl alcohol at 90% concentration or higher for cleaning the frame after screen removal
- Lint-free cloths to wipe surfaces without leaving fibers behind
Organization and adhesive:
- Magnetic screw mat or small cups to keep screws sorted by removal order
- Replacement adhesive strips pre-cut for your specific phone model
| Tool | Purpose |
|---|---|
| Precision screwdriver set | Removes model-specific screws without stripping heads |
| Suction cup | Creates a gap between screen and frame for safe separation |
| Plastic pry picks | Slices adhesive without scratching the frame |
| Isopropyl alcohol (90%+) | Cleans old adhesive and oils from the bonding surface |
| Magnetic screw mat | Keeps screws organized so reassembly is accurate |
Pro Tip: Avoid metal spudgers unless you have experience. iFixit warns that metal spudgers can scratch surfaces and cause electrical shorts if they contact the logic board. Plastic tools handle 95% of the job safely.
Check the phone repair tips on The-tech-savvy-gal's blog for model-specific tool recommendations before you buy anything.
How to power down and prepare your phone before disassembly
Skipping preparation is the fastest way to damage your phone or hurt yourself. A lithium battery that gets punctured during disassembly can swell, overheat, or catch fire. Take five minutes to set up correctly before touching a single screw.
Preparation checklist:
- Power off the phone completely. Do not just lock the screen.
- Remove the SIM card tray using the ejector pin and set it aside safely.
- Remove any case, screen protector, or pop socket.
- Clear a flat, well-lit workspace. A white surface helps you spot tiny screws.
- Place an anti-static mat or ESD wrist strap on your work area if you have one. Static discharge can damage sensitive components on the logic board.
Pro Tip: Take photos of your phone before disassembly, especially around the screw locations and cable positions. These photos are your reference map during reassembly. This one habit prevents most reassembly errors.
If your phone has had any water exposure recently, read up on water damage first steps before proceeding. Internal moisture changes how you should handle the battery and connectors.
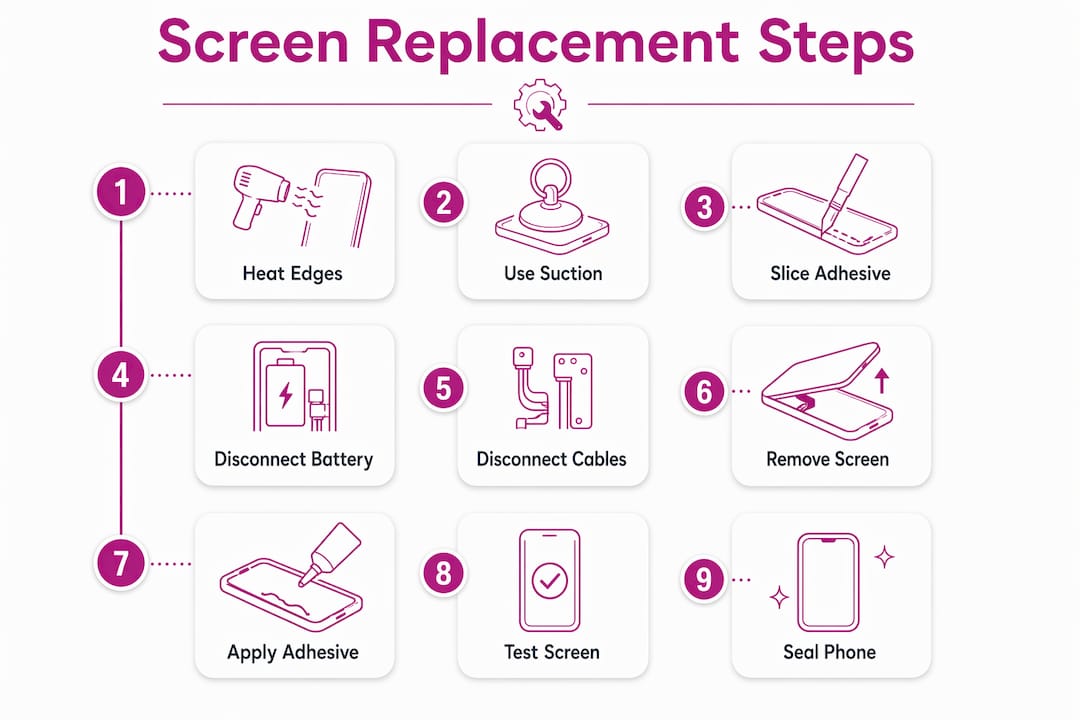
Step-by-step guide to removing and replacing your phone screen
This is the core of the phone screen repair guide. Follow each step in order. Rushing any single step is the most common reason repairs fail.
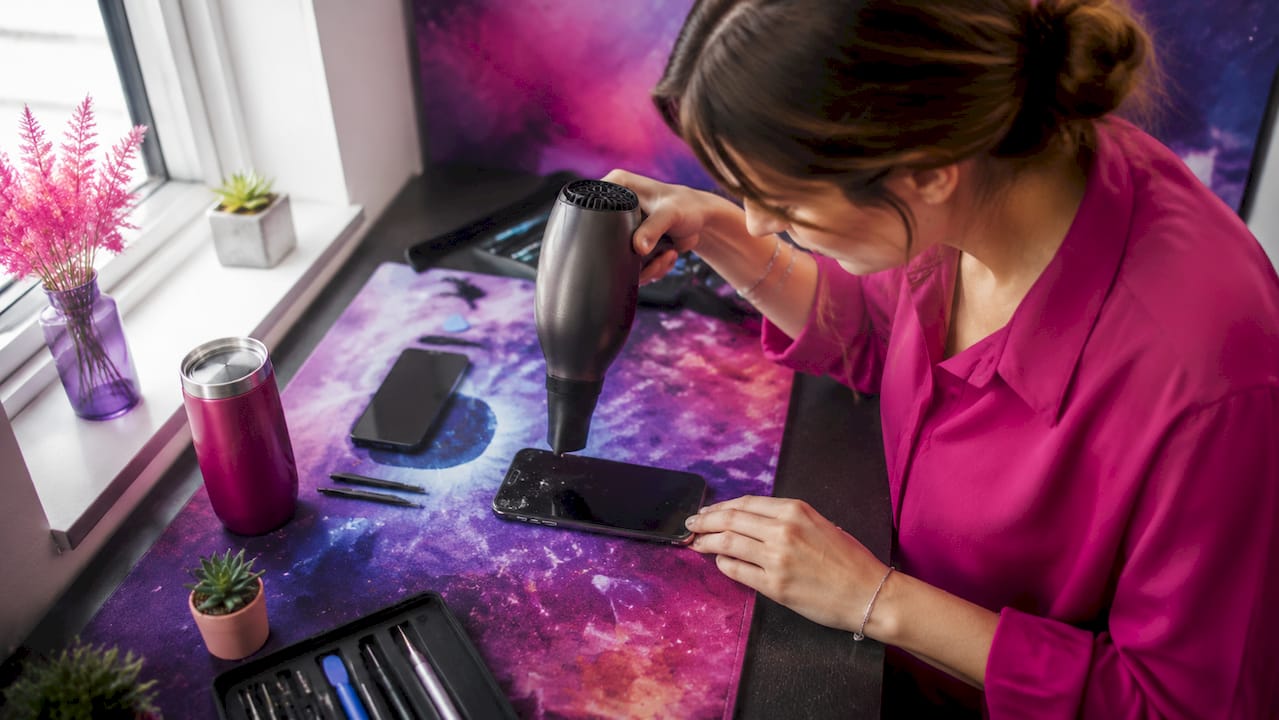
Step 1: Heat the screen edges
Apply low heat around the perimeter of the screen for 30 to 60 seconds. INAIRSPACE advises keeping the surface warm to the touch, not hot, and moving the heat source constantly to avoid concentrating heat in one spot. Overheating can warp the frame or damage the battery sitting just beneath the screen.
Step 2: Create a gap with the suction cup
Press the suction cup onto the lower portion of the screen, away from the front camera. Pull upward with steady, firm pressure while the adhesive is still warm. You are not trying to rip the screen off. You are creating a small gap, roughly 1 to 2 millimeters, to insert a plastic pick.
Step 3: Slice the adhesive with plastic picks
Slide a plastic pick into the gap and drag it slowly along the bottom edge. Insert additional picks to hold the gap open as you work around the sides. For water-resistant phones like the Samsung Galaxy S24, limit pick insertion to about 5mm depth to avoid cutting flex cables that run close to the edges near the volume buttons. Reheat sections that resist separation rather than forcing the pick deeper.
Step 4: Disconnect the battery connector
Once the screen is loose, do not pull it free yet. Open it like a book, hinging from the side opposite the flex cables. Locate the battery connector on the logic board and disconnect it first using a plastic spudger. This cuts power to the board and protects against accidental shorts during the next steps.
Step 5: Disconnect the screen flex cables
The screen connects to the logic board through one or more flex cables. Use a spudger to carefully lift the connector covers and pop each connector upward. Flex cable reconnection is the most frequent source of post-repair failures, so pay close attention to how each connector sits before removing it. Take a photo.
Step 6: Remove the old screen and clean the frame
Lift the old screen away. Now clean the frame thoroughly. iFixit recommends scraping off all old adhesive residue and wiping the frame with isopropyl alcohol at 90% concentration or higher on a lint-free cloth. A flat, residue-free surface is what makes new adhesive bond properly and keeps dust and moisture out.
Step 7: Apply new adhesive and connect the new screen
Apply your replacement adhesive strips to the clean frame, following the pre-cut shape for your model. Route the new screen's flex cables through the frame opening and connect each one firmly. Alignment matters. Flex connector misalignment or debris on the contacts causes screens that appear functional but do not respond to touch.
Step 8: Test before you seal
This step saves you from having to reopen the phone. Reconnect the battery connector, then power on the device. iFixit recommends flipping the screen onto the frame and running a full diagnostic before pressing it into the adhesive. Test touch response across the full screen, check the front camera, and verify Face ID or fingerprint sensors work.
Pro Tip: Run your finger in a grid pattern across every corner of the screen. Dead zones in the corners usually mean a flex cable is not fully seated.
Step 9: Seal and reassemble
Once everything tests correctly, press the screen firmly into the frame starting from one edge and working across. Apply even pressure for 30 to 60 seconds. Reinstall all screws in reverse order from removal. Replace the SIM tray and power on the phone one final time to confirm everything held.
| Repair stage | Key action |
|---|---|
| Heating | Keep heat moving; warm to touch only |
| Adhesive slicing | Limit pick depth to 5mm on water-resistant models |
| Cable disconnection | Disconnect battery first, then screen cables |
| Frame cleaning | Use 90%+ isopropyl alcohol on a lint-free cloth |
| Pre-seal testing | Power on and test all functions before sealing |
Common mistakes to avoid when replacing a phone screen
Even experienced DIYers make these errors. Knowing them in advance puts you ahead.
- Using metal tools near the logic board. Metal spudgers are useful in tight spaces but carry real risk. One slip across a circuit trace can kill the board entirely.
- Forcing the screen open without enough heat. Cold adhesive does not give. Forcing it snaps flex cables or cracks the frame. Reheat and try again.
- Skipping the pre-seal test. Sealing a screen with a bad connection means reopening the phone and starting over. Always test first.
- Not cleaning old adhesive completely. Residue prevents new adhesive from bonding flat. Cleaning the frame with high-concentration isopropyl alcohol is not optional. It determines whether your seal holds for months or fails in days.
- Ignoring biometric calibration. Some fingerprint sensors and Face ID systems require a software diagnostic after replacement to function correctly. A hardware connection alone is not always enough.
If your screen shows dead pixels, uneven backlight, or no touch response after reassembly, power off immediately and reopen the phone to check flex cable seating before assuming the replacement screen is defective.
Pro Tip: Work in a slightly humid room if possible. Dry environments increase static buildup, which can damage sensitive components even without visible sparks.
Key takeaways
Successful DIY screen replacement depends on correct tool selection, controlled heat application, thorough adhesive cleaning, and testing before sealing.
| Point | Details |
|---|---|
| Tool selection matters | Use plastic spudgers and picks to avoid scratching surfaces or shorting circuits. |
| Heat with control | Keep the heat source moving and the surface warm, not hot, to protect internal components. |
| Clean the frame completely | Scrape old adhesive and wipe with 90%+ isopropyl alcohol before applying new adhesive. |
| Test before sealing | Power on and test all screen functions before pressing the screen into the adhesive. |
| Flex cables are the weak point | Misaligned or debris-covered connectors cause most post-repair failures. |
What I've learned from watching too many DIY repairs go sideways
I have seen a lot of phone screen repairs, both successful ones and the ones that ended with a second trip to a repair shop. The single biggest mistake people make is treating this like a speed competition. The steps for screen replacement are not complicated. What trips people up is impatience.
The most overlooked step is always the pre-seal test. People get excited when the new screen lights up and immediately press it down into the adhesive. Then they discover the touch response cuts out in the top-left corner, or Face ID stopped working, and now they have to peel the screen back off a fresh adhesive bond. That is frustrating and avoidable.
My honest advice: invest in a quality plastic pry tool set before you start. The cheap kits that come with replacement screens are often too thick or too flexible to work cleanly. iFixit sells individual tools that are worth every dollar. The difference between a $3 pick and a $12 pick is the difference between a clean repair and a scratched frame.
Also, know your limits. If your phone is a Samsung Galaxy S24 or any model with IP68 water resistance, the adhesive system is more complex and the margin for error is smaller. A cracked screen repair decision is not always a DIY decision. Sometimes the cost of professional repair is worth the guarantee that comes with it.
— Gwensheca
Need a hand? The-tech-savvy-gal has you covered in Denton, TX
Not every repair goes as planned, and that is completely okay.

The-tech-savvy-gal offers same-day phone screen repair services in Denton, TX, backed by certified technicians and a repair warranty. If your DIY attempt hit a snag, or if you would rather hand the job to someone with professional-grade tools from the start, the team is ready to help. Every repair uses quality parts, comes with honest pricing, and gets your phone back to you fast. Stop by or book your repair today at The-tech-savvy-gal's Denton location and skip the stress entirely.
FAQ
What tools do I need to replace a phone screen at home?
You need a precision screwdriver set, suction cup, plastic pry picks, a spudger, tweezers, a heat source like a hair dryer, isopropyl alcohol at 90% or higher, and replacement adhesive strips matched to your phone model.
How long does a DIY phone screen replacement take?
Most first-time repairs take between one and two hours when following a step-by-step phone screen replacement tutorial carefully. Experienced repairers can complete the same job in 30 to 45 minutes.
What happens if I skip the pre-seal test?
Skipping the test risks sealing in a faulty connection. If a flex cable is misaligned or a connector has debris on it, testing before sealing catches the problem before you have to reopen the phone.
Can I replace a screen on a water-resistant phone myself?
Yes, but it requires extra care. Water-resistant models like the Samsung Galaxy S24 need controlled heat around 80°C, limited pick insertion depth, and specific adhesive to restore the moisture seal after reassembly.
Why is my new screen not responding to touch after replacement?
The most common cause is a flex cable that is not fully seated or has debris on the connector contacts. Power off the phone, reopen it, and firmly reseat each screen connector before assuming the replacement screen is defective.